A chocolate alternative for those prone to Acne, Migraines, and Digestive Issues…
I am obsessed with this hot creamy chocolate-y tasting hello to my soul delectable drink.
Well at least to my taste buds, may not be for everyone! LOL
I have been playing around with a recipe to get a healthier-type version of hot cocoa but without some of the ingredients that bother me. This is not actually chocolate at all! This recipe is made with Carob!Carob is a bean from the legume family, yes beans!The Carob evergreen tree is native to the Mediterranean region and the Middle East. Stay with me, don’t knock it until you try it. LOL!! Seriously!!! And there are some health benefits!
Why would I do that? For me personally, I’m prone to acne breakouts and have found that even dairy-free, cane-sugar free chocolate still breaks me out! So….. I have found my alternative so I can still enjoy some of my favorite treats with ingredients that will work for me!
Carob may also be a good alternative for those that have digestive issues or have been told to steer away from chocolate due to the caffeine and/or tyramine, a compound found in chocolate that can trigger migraines!
You can use carob powder and carob chips the same way as you would chocolate in almost all recipes!
Carob is:
Caffeine-free
Tyramine-free (a compound found in chocolate that can trigger migraines)
High fiber
Contains Antioxidants
Gluten-free
Naturally sweet, not bitter in which can satisfy one’s sugar cravings naturally.
A delectable way to still enjoy one’s favorite sweet treats with fewer calories, fat, and sugar.
Random fact: If you happen to drop a piece on the floor and your dog comes rushing over like a vacuum cleaner – according to the ASPCA, it is non-toxic to dogs and cats.
Recipe: Place all ingredients in a pot over med-high heat, whisk all together. Whisk frequently until you have it to the warm/hot temperature you wish. Enjoy! This serving will fill a large mug or two small mugs.
· 1 heaping TBS Organic Carob Powder (found on Amazon and sometimes Natural Food stores)
· 1 TBS Organic Maine Maple Syrup
· 1 ¾ Cup Organic Chobani Extra Creamy Oat Milk (found at Hannafords/Shaws)
· 1 Dash Organic Cayenne Pepper (I know, but it gives it that chocolate burn) trust me! LOL
· 2 Dashes Organic Cinnamon
Optional: Top off with Coconut Whipped Cream and Cinnamon sprinkles!
Bring a pot of lightly salted water to a boil. Add potatoes, ensuring enough water to cover potatoes and cook until tender, about 15 minutes.
Drain, and Mash.
Add Oat or Flaxseed Milk to potatoes (usually no more than a 1/2- 1 Cup depending on the desired consistency of your liking).
Add Garlic Powder, Himalayan Salt, and Black Pepper as needed. Certainly, lightly on salt.
Sprinkle finished mashed potatoes with Parsley.
Sautee in a separate pan Mushrooms and Onion with desired spices of choice. Once cooked, add in 1-2 Cans of Organic Black Lentils (drained). Add Organic Corn if desired.
Mix and use mushrooms, onions, lentils, and corn mix for Potato topping.
Amounts vary, depending on how much, there is no wrong way of doing it. Just play around with your desired amounts.
In the United States, dietary factors are the most important risk factors for disease, yet medical schools fail to provide adequate nutrition education. As a consequence, medical students graduate without the knowledge base or skills needed to address nutrition-related concerns in clinical practice.
In my experience, most medical students either vastly underestimate the health-promoting potential of plant-based nutrition or believe nutrition misinformation and misleading claims. Although the following studies don’t entirely fill the nutrition void in most medical education programs, they demonstrate the value of whole-food, plant-based (WFPB) nutrition in clinical practice.
1. A Way to Reverse Coronary Artery Disease
In this 2014 prospective cohort study, Caldwell Esselstyn, MD, and his team put 198 patients with cardiovascular disease on a WFPB diet. The researchers were interested in cardiac events and the degree of adherence to the nutritional intervention. Of the 198 participants, 177 were adherent (89 percent) and 21 were non-adherent (11 percent). Over a mean duration of 3.7 years, 13 of the 21 non-adherent patients experienced cardiac events, while only one of the 177 diet-adherent patients experienced a cardiac event (stroke). The results “confirm[ed] the capacity of WFPB nutrition to restore health in ‘there is nothing further we can do’ situations,” the study authors wrote. Researchers included a before-and-after arteriogram (right) of one participant’s coronary artery showing clear stenotic reversal.
2. The Lifestyle Heart Trial
In this trial, lifestyle medicine pioneer Dean Ornish, MD, and his team randomized 48 participants with coronary heart disease to either an intensive lifestyle change group (including a WFPB diet) or a usual-care control group. After five years, the lifestyle change group saw a significant reversal of coronary atherosclerosis, while the usual-care group saw a progression of their disease. Eighty-two percent of patients who followed the lifestyle change program had some level of regression of atherosclerosis, and there was a 90 percent reduction in reported angina during the first month of the program. Compared to the usual-care group, the lifestyle change group saw significantly fewer cardiac events and a 400 percent improvement in myocardial perfusion over the five-year follow-up period. Because the program helped patients safely avoid revascularization and other cardiac procedures, the calculated net savings of the program was nearly $30,000 per patient after just one year.
3. Treating Type 2 Diabetes
In this 74-week trial, Neal Barnard, MD, and his research team randomized 99 participants with type 2 diabetes to a low-fat, vegan diet or a diet following American Diabetes Association (ADA) guidelines. They found the low-fat, vegan diet to be significantly more effective than the ADA dietary guidelines at achieving glycemic control. After controlling for changes in medication, compared to the conventional group, the vegan group saw significantly greater reductions in glycated hemoglobin (HbA1c) values and LDL-cholesterol. The same group of researchers also found that patient adherence and acceptability of the low-fat, vegan diet protocol were comparable to conventional nutrition protocols, indicating no barrier to its use in medical nutrition therapy.
4. Lifestyle Versus Genetics
With genomics research and the age of personalized medicine on the horizon, the medical profession is looking for more answers and more advanced treatments for our ailments. However, to most effectively prevent and reverse disease, current research suggests we ground our hope in lifestyle medicine. In this special viewpoint in Science, Walter Willett, MD, DrPH, discusses what we know about the relative importance of genetic and lifestyle factors for disease prevention. Of note, large cohorts have shown that while our genes play only a tiny role in predicting disease, modest changes in lifestyle—including diet—may prevent more than 90 percent of type 2 diabetes, 80 percent of coronary heart disease, and 70 percent of colon cancer.
5. Sick Individuals and Sick Populations
In a landmark 2001 paper published in the International Journal of Epidemiology, Geoffrey Rose, MD, helps explain why nutrition studies often underestimate the role of diet in disease: because they can’t detect homogenous exposures. As an example, Dr. Rose uses serum cholesterol and development of heart disease. If we conduct an observational study in a population where almost everyone has high serum cholesterol, we will fail to detect serum cholesterol as an important risk factor for heart disease. Instead, we will pick up what makes individuals more susceptible to heart disease given high serum cholesterol status, such as genetic or other lifestyle factors. The same is true in nutrition studies. Most of them fail to detect nutritional risk factors in health outcomes because the Standard American Diet is nearly ubiquitous. Only in sufficiently large studies or studies that include relatively strict interventions (e.g., a WFPB diet) do we begin to see the profound effect nutrition has on health.
6. Water Fasting and Plant-Based Eating for Hypertension
In this single-arm, interventional study, 174 patients with hypertension did an average 10- or 11-day, water-only fast followed by a six- or seven-day WFPB refeeding period with no added sugar, oil, or salt. Almost 90 percent of patients achieved blood pressure less than 140/90 mmHG, and those with the most severe hypertension had an average reduction in blood pressure of 60/17 mmHg. All patients on blood pressure medications were off those medications by the end of the protocol. This treatment protocol shows water-only fasting and subsequent WFPB diet is a safe and highly effective treatment for hypertension. Notably, blood pressure continued to decrease during the refeeding period, suggesting the sustainability of this intervention in normalizing blood pressure.
7. Lifestyle Changes and Progression of Prostate Cancer
In this trial, 97 men with prostate cancer were randomized to an intensive lifestyle change group (including a WFPB diet) or a usual care control group. After a year, the lifestyle group serum prostate specific antigen (PSA) concentration, one of the most useful indicators of prostate cancer, had decreased an average of 4 percent, while average PSA levels in the usual care group increased 6 percent. Furthermore, serum taken from participants in the lifestyle group was almost eight times as powerful at inhibiting the growth of prostatic cancer cells in vitro compared to the usual care group. The researchers found a dose-response relationship: the degree of adherence to the recommended lifestyle changes was correlated with the changes in serum PSA and cancer cell growth inhibition.
8. The Adventist Health Studies
These studies include large prospective cohort studies on Seventh-Day Adventists, a population with an unusually high proportion of strict vegetarians in an otherwise homogenous group. These studies have produced some remarkable findings: Compared to nonvegetarian diets, vegan diets were associated with half the risk of type 2 diabetes and about 7-point lower systolic and diastolic blood pressure, after controlling for relevant variables including BMI. This suggests that veganism was protective for these conditions beyond its association with lower body mass. Furthermore, compared to nonvegetarians, vegans had significantly fewer chronic diseases, were on fewer medications, had fewer allergies, and reported less health service use (hospitalizations, surgeries, etc.).
Evidence is Mounting
Although these studies are compelling, medical students know to look for consistency in the literature. Rest assured, hundreds of systematic reviews and meta-analyses provide evidence for even the most skeptical medical students and physicians. From lowering blood cholesterol, body weight, and inflammation to protecting against heart disease, cancer, and diabetes, systematic reviews and meta-analyses have consistently shown the benefits of plant-based nutrition.
Plant-Based Resources for Medical Students and Physicians
There are many resources available online to learn more. The American College of Lifestyle Medicine is the professional medical association devoted to the cause of lifestyle medicine and helps address the need for education and certification in the field. The Physicians Committee for Responsible Medicine provides great resources for physicians interested in making nutrition central to their practice. The T. Colin Campbell Center for Nutrition Studies partnered with eCornell to offer a Plant-Based Nutrition Certificate that will help you gain a deeper understanding of optimal health, and even counts for continuing education credits. Lastly, PlantBasedResearch.org is an online narrative review of over 700 peer-reviewed research articles related to plant-based nutrition. The site allows users to search and sort by research topic, study design, keywords, or other variables.
• 3 large sweet yams- diced
• 3 large carrots- chopped
• 3 celery stocks-chopped
• 1 large onion- peeled and diced
• 3 cloves garlic- peeled and minced
• 6 cups low-sodium vegetable broth
• 1 orange-freshly squeezed
• 1 Tbs ginger powder (or freshly grated)
• ½ tsp thyme spice
• ½ tsp ground nutmeg
• ½ tsp of Cayenne (taste test, add more if you like)
• 1-2 Tbs of garlic powder (yes more garlic)
• 1 teaspoon ground cinnamon
• 1½ cups unsweetened plain almond milk (sometimes Ill use 16 oz/1 lbs of red lentils (pre-cooked) instead of almond milk. It adds more protein, thickness and is delightful!
• Himalayan Salt and freshly ground black
pepper to taste
• Fresh Parsley (or dried) to sprinkle on top of
each soup serving!
Instructions:
Sauté onion over medium heat for 10 minutes. Add water (1 to 2 tablespoons) at a time to keep the onion from sticking to the pan.
Add all the spices and cook for 1 minute.
Add the sweet yams, carrots, celery, vegetable stock, orange juice and bring the pot to a boil over high heat.
Reduce the heat to medium- Cover and cook for 25 minutes, or until the yams are tender.
Puree the soup using a blender/food processor with a tight-fitting lid. Use a big ladle to transfer and be careful as it is HOT! Sometimes using two pots is easier for the transfer process!
Return the soup to the pot and add the almond milk, stir well- If you use lentils instead, puree with rest of the soup!
Cook for an additional 5 minutes, or until heated through, and season with H-salt and pepper (optional add 1 can of garbanzo beans).
The below is a basic introduction with holistic thoughts to consider to assist with optimizing your cholesterol.
Bad/LDL (Low-density lipoprotein) cholesterol – can combine fats and other substances, resulting in accumulations along the inner walls of the arteries. This buildup can lead to narrowing and obstruction, thereby reducing blood flow.
Good/HDL (High-density lipoprotein) cholesterol – carries harmful cholesterol away from the arteries and helps protect us from a heart attack and stroke.
Triglycerides – represent the most common type of fat in the human body and originate both from the food we consume and from internal metabolic processes. When we take in excess calories, sugars, or alcohol, the body converts these nutrients into triglycerides for storage. Elevated triglyceride levels are frequently observed in individuals with high total cholesterol, often occurring alongside increased LDL (“bad”) cholesterol and reduced HDL (“good”) cholesterol. Triglycerides are composed of three fatty acids attached to glycerol.
Saturated Triglycerides – biggest dietary cause of high LDL (“bad”) cholesterol, found in butter, cheese, whole milk, dairy ice-cream, dairy and coconut full fat yogurts, tropical oils (palm & coconut), fatty meats, poultry, fish, eggs, and many ultra-processed foods.
Monounsaturated Triglycerides – can help lower cholesterol, found in avocados, nuts, seeds, etc.
Polyunsaturated Triglycerides Omega 3 + Omega 6 – can also help lower cholesterol, also found in avocados, flaxseed, chia seeds, sunflower seeds, etc. (being mindful that one can overdue Omega 6 fats in particular). There is a ratio to consider. ***more on food below***
Why Does Cholesterol Matter?
Elevated cholesterol can restrict blood flow to the heart (and other areas of the body) by causing plaque buildup, which narrows and hardens the arteries—a condition known as atherosclerosis. If a clot forms and blocks an artery, a heart attack and/or stroke can occur along with an increased risk for blockages in blood vessels beyond your heart. Often, high cholesterol presents no obvious symptoms, making it a silent risk.
Generally our liver naturally produces all the cholesterol we require. Consuming certain animal and plant products along with ultra-processed foods can prompt the liver to generate excess cholesterol. This accumulation as discussed above forms deposits in the arteries, further narrowing them and increasing the risk of cardiovascular events.
Additional factors such as smoking, diabetes, and high blood pressure heighten the likelihood of heart attack, stroke, and coronary heart disease. When combined, these risks can have a more severe impact.
Research also links high cholesterol with an increased risk of Alzheimer’s disease, underscoring its effect on both heart and brain health.
What are the Levels:
Disclaimer: These ranges are not absolute, your medical practitioner/provider will need to interpret specifically for you.
Total Cholesterol <200 mg/dl is desirable
•200-239 mg/dL borderline high
•>240 mg/dL considered high
LDL/Bad <100 mg/dL Optimal
•101-129 mg/dL near optimal if no risk factors)
•130-159 mg/dL borderline high
•160-189 mg/dL is high
•>190mg/dL very high
HDL/Good >60 mg/dL or higher is optimal
•41-59 mg/dL borderline low
•40 or less mg/dL very low
Triglycerides <150 Optimal
•150-199 Borderline
•200+ High
There are other factors to be considered: along with other possible tests and measurements that may need to be performed. Recent studies have shown that about 35% of heart attacks occur in people with a total cholesterol between 150-200. That level is considered good/desirable! Relying solely on a traditional lipid profile test may not fully capture an individual’s cholesterol/cardio risk factors.
Please consider looking into the importance of these other lab tests (some of these have not quite reached all primary mainstream medicine) called: Apo B and A-1, lipoprotein (a) and lipoprotein fractionation for particle number and size, and apolipoprotein E genotype (which assess risk for both cardiovascular disease and dementia). Exploring these additional assessments can provide a more comprehensive understanding of your cardiovascular and cognitive health, empowering you to make informed decisions in collaboration with your healthcare provider. — Reference: Dr. Mark Hyman, The Young Forever, page 175, published in 2023.
What Can We Do to Help our Cholesterol?What do we consume?
Diet plays a significant role in overall health. Fiber-rich foods are key in reducing cholesterol levels. Such as consuming a variety of whole, unprocessed plant-focused foods as the base of your meals—including fruits, vegetables, whole grains (not flours), tubers, nuts, seeds, and legumes. Adopting a healthy eating pattern has the potential to reduce reliance on cholesterol-lowering medications. Most plant-based foods are inherently high in fiber (key) and potassium, while being low in sodium, unhealthy fats, and cholesterol. Including more whole foods over ultra-processed foods helps facilitate limiting the intake of sodium, saturated fats, sugars, and trans fats. Reducing the amount of animal saturated fats (such as those found mostly in meat and dairy products), added oils (like coconut and palm), and highly processed plant & animal pre-packaged foods can decrease blood viscosity. Which may benefit overall cardiovascular health and help your heart not push as hard to keep blood moving.
See the list of foods under Saturated fats above. This does not necessarily mean one needs to avoid them entirely, but certainly consider a reduction (reduced amounts vary depending how much is already consumed) along with adding/combining more fiber-rich “whole” foods from the ground. Currently some experts suggest limiting saturated fat intake to no more than 5-6% of total daily calories (approximately 11–13 grams for a standard 2,000-calorie diet) which has been associated with reductions in cholesterol. Though some may benefit by eliminating animal products entirely (or have days in a week that are animal cholesterol and “saturated” fat free days), one should seek guidance on how to ensure all nutrients are balanced. Example, if one focuses on animal free/whole-food plant-based diets only, there are certain things that need to be considered such as guidance on proper type and dosage of B12 (imperative), etc. Even other diets have considerations for B12 depending on other factors, for example, age. Research is finding, focusing on more on “whole” plant-based could assist some people more impactfully in reducing cholesterol levels. Please reach out for nutrition guidance and keep learning about how you can uniquely optimize your diet to meet your personal needs. Some may also need to stage into layering higher fiber-rich type foods over time in order for the gut microbiome to adjust for GI comfort. More resources below.
What are some other special holistic things you can consider?
Additionally, research indicates that consuming two Brazil nuts per week can favorably influence cholesterol levels. And no more than 2 per day due to high levels of selenium. For further details: https://nutritionfacts.org/topics/brazil-nuts/
Replacing saturated fats with unsaturated fats found in avocados, walnuts, and olives (excluding olive oil) may contribute to improved blood cholesterol levels. We want to focus on “whole” not “processed”. Olives, over olive oil, avocado, over avocado oil, etc.
Smoking cessation may increase beneficial cholesterol by as much as 10%.
Disclaimer Note: AJ Macomber is not a Medical Doctor, Practitioner, or a Licensed Registered Dietitian. AJM is not here for medical diagnostics, treatment procedures, or nutrition therapy. To learn more about AJ, click here https://aj-macomber.com/sample-page/Understand that you should seek medical advice and be closely monitored by your physician or a licensed health care professional before choosing to start or continue any lifestyle changes such as but not limited to dietary changes, supplemental changes, or physical activity changes, especially if you may be pregnant, or have any pre-existing injuries or medical conditions.This is general information only, not a full formal outline or guide. Over time, currency and completeness of the information may change. 6-1-2019 AJ/Updated 2025
1/3 cup of pure 100% maple syrup (1/2 cup for cookies)
1/3 cup of unsweetened applesauce
1 large banana or 2 small banana’s-mashed
1 bag of Vegan Choc Chips (optional) cranberries are nice as well. My favorite Chocolate chips are from Evolved! Simple and amazingly delish!
Instructions:
Mix dry ingredients in one bowl
Mix wet ingredients in another bowl
Combine ingredients and fold in vegan chocolate chips
Place in non-stick muffin tins and bake!
350 deg. x12-18 minutes (depends on how thick) use toothpick or fork check!
Notes: For cookies (same recipe), place on parchment paper!
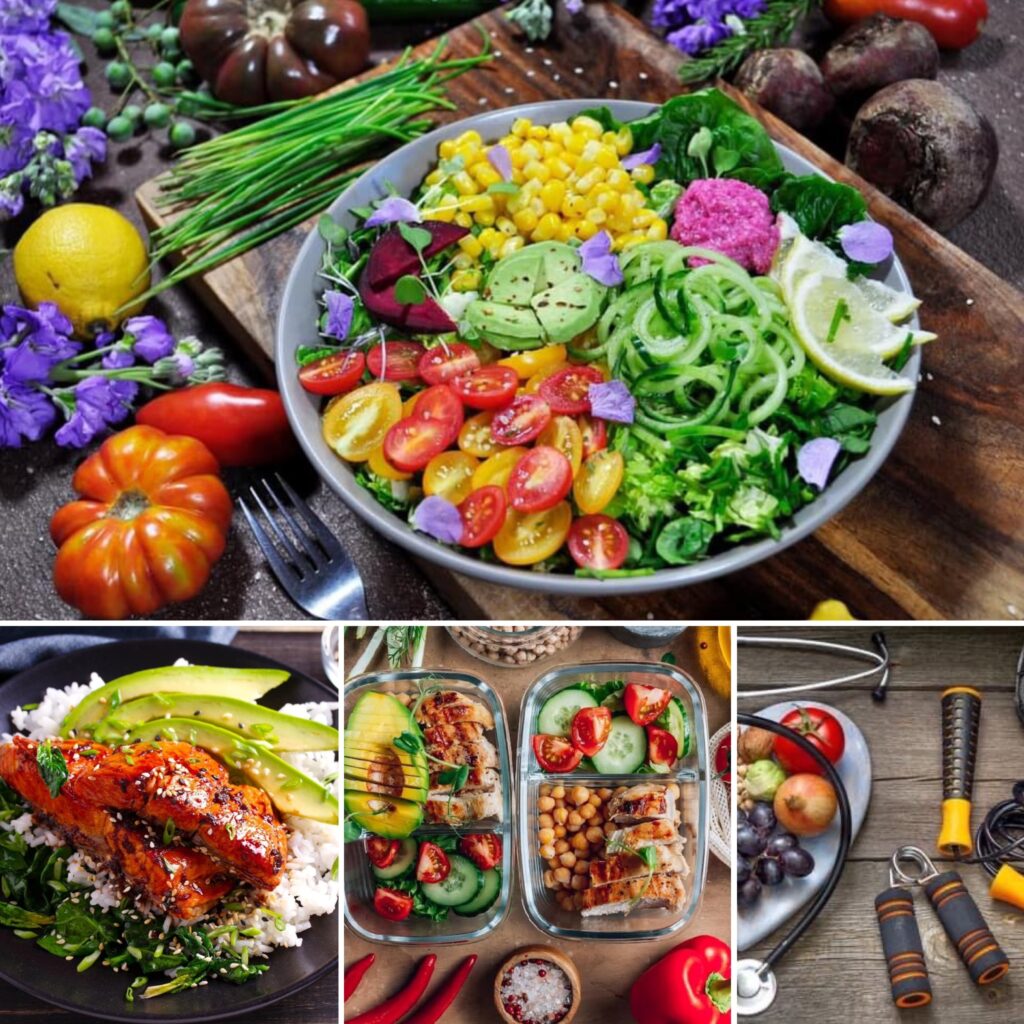
See some clinical studies broken down into layman’s terms. Know anyone that is trying to avoid high cholesterol, high blood pressure, heart disease, diabetes 2, hormone issues, mood issues, etc….? This might be neat to share with them. Very inspiring!
• 1 cup Organic Spelt Flour • 1 tbsp. Baking Powder (not baking soda) • 1 tsp. Cinnamon • ¼ tsp. of Himalayan Salt
Mix dry ingredients together first and let it set for 2 minutes in a bowl (helps the pancakes to become fluffy).
Then add:
• 1 cup Filtered Water • 2 tbsp. of 100% Pure Maple Syrup (or sweetener of choice, I sometimes use coconut sugar) • 1 tsp. of 100% Pure Vanilla Extract
Mix all together in your bowl!
1. Cook in 1/4-1/2 cup portions in a lightly oiled non-stick pan over medium-high heat. 2. Once there are a few bubbles in the middle (add wild blueberries), flip, and cook for a few more minutes on the other side.
Enjoy!
Note: I typically make these as a dessert! Topped with Vegan butter (let it melt), Maple Syrup, Cinnamon, and a dollop of Vanilla Bean Ice Cream! Drool!
The “Paleo Diet” is on to something- not eating any processed foods which is a great start to optimal health! Filling our bellies “mostly” with foods right from the ground- vegetables, tubers, whole grains, beans, peas, fruits, nuts, and seeds. How much plant-foods were they eating? Let us take a closer look, literally! ~AJ
Makes: about 12 cups Ready In: 1 hour and 15 minutes
Ingredients:
• 5 medium tomatoes-diced, or 3
(15-ounce) cans diced tomatoes, with
their juice (5 cups)
• 2 red bell peppers, cored, seeded, and
cut into ½-inch dice (2 cups)
• ½ medium red onion, finely chopped (1
cup)
• 4 small garlic cloves, roughly chopped
(2 teaspoons)
• 4 teaspoons dried Mexican oregano
• 2 teaspoons ground cumin
• 2 (15-ounce) cans black beans, rinsed
and drained (3 cups)
• 3 large celery stalks, cut into ¼-inch
dice (1½ cups)
• 1 green bell pepper, cored, seeded,
and finely chopped (1 cup)
• 1 cup fresh or frozen corn kernels
• ½ bunch kale, stemmed and roughly
chopped (2 cups)
• ¼ cup finely chopped fresh cilantro
• 2 tablespoons fresh lemon juice (from 1
lemon)
• 2 teaspoons smoked paprika
• ¼ teaspoon chili powder, or to taste
• Sea salt- AJ would use Himalayan Salt
Instructions:
1. In a large stew pot or Dutch oven, place the tomatoes, red bell peppers, onion, garlic, oregano, and cumin, and cook over medium heat, stirring occasionally, for 20 minutes (the juices from the onion and tomatoes will be enough to keep the sauce from burning).
2. Remove from the heat and let cool for 10 to 15 minutes. In a blender in batches or using a hand blender, blend the sauce until smooth. Return to the pot.
3. Add the black beans, celery, green bell pepper, corn, kale, cilantro, lemon juice, paprika, chili powder, salt to taste, and 2 cups water to the pot. Bring to a boil over high heat. Reduce the heat to low and simmer until the greens are tender and the chili thickens, 10 to 15 minutes.
4. Serve hot over steamed grains or with warm tortillas.
Chef’s notes: For storing, cool the soup completely and transfer to an airtight container.
Store in the refrigerator for 4 to 5 days or in the freezer for up to 1 month.